Discover the Perfect Easy Mochi Recipe – Soft, Chewy, and Irresistible
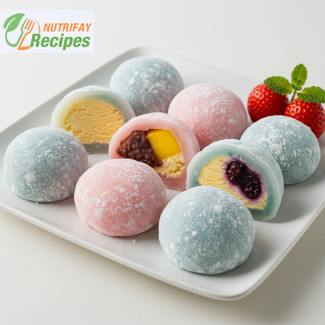
If you’ve ever wanted to experience the authentic taste of Japanese mochi, this easy mochi recipe is the perfect place to start. These soft, chewy rice cakes have a delightfully smooth texture with a light, subtly sweet flavor that makes them utterly addictive. Whether you’re making them for a special occasion, a traditional celebration, or just to enjoy as a sweet treat, this homemade mochi will impress with its authentic texture and flavor.
This simple mochi recipe requires just a handful of ingredients, and you don’t need any special equipment—just a microwave or a stovetop to steam the dough. You’ll learn the secrets to getting that perfectly chewy consistency, making your own delicious homemade mochi right in your kitchen. Plus, you can fill them with your favorite flavors, from classic red bean paste to chocolate, matcha, or even fresh fruit.
Why You’ll Love This Easy Mochi Recipe
- Simple and quick – No complicated techniques, just a straightforward process that makes mochi accessible to everyone.
- Perfectly chewy and soft – This recipe ensures your mochi has that signature elasticity and smooth texture.
- Customizable flavors – From traditional fillings like sweet red bean paste to modern twists like peanut butter, Nutella, or fresh strawberries.
- Gluten-free and dairy-free – Naturally suitable for those with dietary restrictions, making it a great alternative to traditional desserts.
- Authentic taste at home – Enjoy the flavors of Japan without needing to visit a specialty store.
What Makes This Mochi Recipe So Special?
Unlike store-bought versions that may contain preservatives, this homemade mochi recipe gives you complete control over the ingredients. You’ll be using glutinous rice flour (sweet rice flour), sugar, and water to create a beautifully stretchy dough that’s lightly dusted with starch for the perfect finish. It’s soft and pillowy, yet holds its shape well, making it ideal for both plain mochi and filled varieties.
If you love the delightful chewiness of traditional Japanese desserts, this recipe is an absolute must-try. You can enjoy mochi on its own or experiment with different coatings like cocoa powder, matcha, or toasted sesame seeds.
How to Make Mochi in Just a Few Steps
You won’t believe how easy it is to make fresh mochi at home! All it takes is a quick mix, a short steaming or microwaving session, and a little bit of kneading to get the perfect texture. Then, simply shape your mochi and fill them with your favorite ingredients.
The key to perfect mochi is handling the dough properly—it will be sticky at first, but dusting your hands and working surface with cornstarch or potato starch helps keep it manageable. Once shaped, these chewy delights can be enjoyed immediately or stored for later.
A Sweet Treat for Every Occasion
Mochi is more than just a dessert—it’s a symbol of good luck and prosperity in Japan, often enjoyed during New Year’s celebrations and special gatherings. However, this recipe makes it easy to prepare mochi any time you crave something sweet and satisfying.
Serve them as a light snack, a unique party dessert, or a fun treat to share with friends and family. You can also get creative and shape them into festive designs for birthdays, holidays, or special occasions.
Try This Easy Mochi Recipe Today!
If you’ve never made mochi at home, now is the perfect time to start. With just a few ingredients and simple steps, you’ll have a batch of chewy, delicious mochi that tastes just like the ones from a Japanese confectionery shop.
Ready to give it a try? Follow this easy recipe and experience the magic of homemade mochi today!
1. Prepare the mochi dough
In a microwave-safe bowl, combine glutinous rice flour, sugar, and salt. Gradually add water while whisking to create a smooth, lump-free mixture. Cover the bowl with plastic wrap, leaving a small gap for steam to escape.
2. Cook the mochi
Microwave method
- Microwave the mixture on high power for 1 minute.
- Stir with a spatula and microwave for another 30 seconds.
- Repeat the process until the dough becomes thick, sticky, and slightly translucent (usually around 2 to 3 minutes in total).
Stovetop steaming method
- Pour the mixture into a heatproof bowl and place it in a steamer over boiling water.
- Steam for 15 minutes, stirring halfway through.
3. Shape the mochi
Dust a clean work surface with cornstarch or potato starch. Transfer the cooked mochi onto the surface and let it cool for 2 minutes. Coat your hands with starch and gently knead the dough for 1 minute until it's easier to handle.
Using a rolling pin, roll out the dough to about 5 mm (¼ inch) thick. Cut into 8 equal pieces using a knife or a cookie cutter.
4. Fill the mochi (optional)
Place a small spoonful of your desired filling in the center of each dough piece. Carefully fold the edges over the filling, pinching them together to seal. Dust lightly with additional starch and place seam-side down.
5. Serve and enjoy
Mochi can be enjoyed immediately or stored in an airtight container at room temperature for up to 24 hours. If using ice cream as a filling, store in the freezer and allow to soften for a few minutes before serving.
Mastering the Art of Easy Mochi Recipe – Tips, Variations, and Flavor Enhancements
Mochi, the iconic Japanese rice cake, is loved for its soft, chewy texture and its ability to pair with a variety of fillings and flavors. This easy mochi recipe allows you to create delicious homemade mochi with minimal effort, but small adjustments in ingredients and technique can lead to different textures, flavors, and even health benefits.
Whether you want to make your mochi sweeter, firmer, softer, or more aromatic, understanding how each component affects the final result is key. Below, we explore how ingredient substitutions, preparation techniques, and flavor variations can elevate this classic Japanese dessert.
Choosing the Right Ingredients for the Best Mochi
The success of your mochi recipe starts with selecting the right ingredients. Each ingredient plays a critical role in texture, sweetness, and elasticity, so even small changes can have a noticeable impact.
The Role of Glutinous Rice Flour
The main ingredient in mochi is glutinous rice flour, also known as sweet rice flour. Despite its name, it does not contain added sugar but is made from a special variety of rice that becomes chewy and elastic when cooked.
Can you substitute different flours?
- Regular rice flour – This will not work as a substitute because it lacks the sticky quality necessary to create the chewy texture.
- Tapioca starch – This can be added in small amounts to make the mochi extra soft and bouncy, but it should not replace the glutinous rice flour entirely.
- Cornstarch or potato starch – These are used for dusting but should not be mixed into the dough itself, as they do not provide elasticity.
Adjusting the Sweetness
Sugar is not just for flavor—it also affects the texture of the mochi by keeping it soft and preventing it from drying out too quickly.
- More sugar – Makes the mochi sweeter and softer, with a longer shelf life.
- Less sugar – Results in a firmer, more neutral-tasting mochi that pairs well with sweet fillings.
- Honey or maple syrup – Can be used instead of granulated sugar, but these add moisture and may require adjusting the liquid content slightly.
Enhancing the Flavor with Natural Additions
The base of mochi is mildly sweet, making it an ideal canvas for different flavors. Adding ingredients directly to the dough can create unique variations.
- Matcha powder – Adds a subtle bitterness and a beautiful green color, balancing the sweetness.
- Cocoa powder – Gives the mochi a chocolatey twist, pairing well with nut-based fillings.
- Vanilla extract – Enhances the natural sweetness with a light aromatic touch.
- Coconut milk instead of water – Makes the mochi rich and creamy with a subtle coconut undertone.
Adjusting Texture and Consistency
How to Make Mochi Softer or Firmer
The texture of mochi depends on the ratio of liquid to flour, as well as the cooking method.
- For softer mochi – Add slightly more water or increase the steaming time by 1 to 2 minutes.
- For firmer mochi – Reduce the water slightly or chill the mochi before serving.
Cooking Methods That Impact the Final Result
Different cooking methods can alter the consistency and elasticity of mochi.
Microwave vs. Stovetop Steaming
- Microwave cooking – Fast and efficient, but requires careful monitoring to avoid overheating. If overcooked, the mochi becomes too firm and difficult to shape.
- Steaming – Produces a softer, more traditional texture and allows better control over consistency.
- Boiling – Used for making mochi balls that are extra soft and stretchy, commonly served in soups or sweet syrups.
Customizing Mochi with Different Fillings
Sweet Fillings That Complement the Chewy Texture
One of the best things about homemade mochi is the versatility of fillings. The right filling can add creaminess, crunch, or extra sweetness to balance the dough.
- Sweet red bean paste – A traditional Japanese filling with a smooth, slightly earthy flavor.
- Nutella or chocolate ganache – Creates a rich, indulgent contrast to the light chewiness of mochi.
- Fresh fruit – Strawberries, mango, and banana slices add natural sweetness and juiciness.
- Ice cream – Mochi ice cream is a modern favorite, but requires freezing the dough before serving to keep the ice cream firm.
Savory Variations
Although mochi is often enjoyed as a sweet treat, it can also be made into savory versions.
- Soy sauce and sugar glaze – A salty-sweet coating often used for grilled mochi.
- Miso paste – Adds umami depth, creating a more complex flavor.
- Cheese-filled mochi – A unique combination where the mochi remains chewy while the cheese melts inside.
Storing and Keeping Mochi Fresh
Freshly made mochi is best enjoyed on the same day, but proper storage can help maintain its texture.
- At room temperature – Store mochi in an airtight container for up to 24 hours to prevent drying out.
- In the refrigerator – Mochi tends to harden in the fridge, so microwave for 10-15 seconds before eating to restore its softness.
- Freezing for longer storage – Wrap each piece individually in plastic wrap and store in the freezer for up to one month. Let it thaw at room temperature before eating.
Making Mochi More Nutritious
While traditional mochi is relatively low in fat, small adjustments can make it healthier or more nutrient-dense.
- Using whole-grain glutinous rice flour – Adds more fiber while maintaining chewiness.
- Reducing sugar – Makes the mochi less calorie-dense without losing its elasticity.
- Adding chia seeds or ground flaxseeds – Boosts the nutritional profile with omega-3 fatty acids and fiber.
Try Your Own Mochi Creations
With these tips and ingredient variations, you can customize your homemade mochi to suit your taste preferences. Whether you prefer classic sweet mochi, fruit-filled treats, or even savory versions, this versatile recipe allows for endless creativity.
Now that you know how to adjust texture, flavor, and fillings, it’s time to put your skills to the test. Try this recipe today and enjoy the chewy, delightful world of mochi in your own kitchen!
This recipe is gluten-free and dairy-free but contains potential allergens depending on the filling:
- Red bean paste – contains sugar
- Peanut butter – contains nuts
- Ice cream fillings – may contain dairy
Ingredient substitutions for allergies
- To make nut-free mochi, avoid peanut butter and opt for fruit or red bean paste.
- If using store-bought fillings, ensure they are gluten-free and do not contain additives.
- To make a sugar-free version, replace sugar with a natural alternative like stevia or monk fruit sweetener.
- Calcium – Supports bone health and nerve function (2% of daily value).
- Iron – Essential for oxygen transport in the blood (3% of daily value).
- Magnesium – Helps maintain muscle and nerve function (4% of daily value).
- Potassium – Aids in blood pressure regulation and muscle function (2% of daily value).
- Flavonoids (if using matcha or red bean filling) – Help reduce inflammation and improve heart health.
- Polyphenols (in fruit fillings like strawberries or mango) – Support immune function and protect cells from damage.
- Vitamin C (in fruit-based mochi fillings) – Enhances collagen production and immune defense.
Recipes worth trying